MP4 to DVD Converter-How to Burn MP4 to DVD on Mac (Yosemite Included)

Several days ago, my older father said he wanted to watch movies. This is a problem because he can’t use computer, iPad or other digital products, but DVD player. So burning videos to DVD disc is a good choice. As we all know, MP4 format is becoming more and more popular, As MP4 is a popular format, I will take this format as an example and write down the whole progress of burning MP4 to DVD in this post.

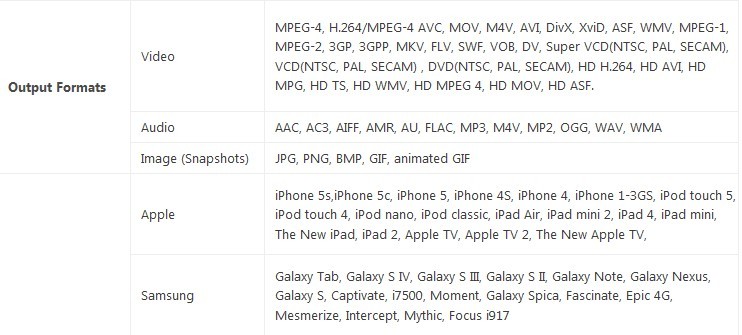
Let’s take a brief look at MP4 format. MP4 is a digital multimedia format most commonly and it can store not only videos, audios, but also other data such as subtitles and still pictures. Like most modern container formats, it allows streaming over the Internet. The only official filename extension for MPEG-4 Part 14 files is .mp4. MPEG-4 Part 14 (formally ISO/IEC 14496-14:2003) is a standard specified as a part of MPEG-4.

burn mp4 to dvdAdoreshare DVD Creator for Mac is a comprehensive DVD burner for Mac users to convert and burn videos to DVDs easily from popular videos like AVI, MP4, WMV, MOV, MKV, FLV, MPG, MPEG, etc. Thus you can watch them on TV using any home DVD player. Below is a detailed guide about how to burn video files to DVD on Mac with Adoreshare DVD Creator for Mac.

How to Burn/Convert MP4 to DVD (DVD DISC)

Step 1: Launch this software, and click “Create a New Project” to create a new DVD from your videos. Then you need to insert a blank DVD disc to your DVD drive.
Note: Mac has no DVD drive, you can connect a third party DVD drive with USB. If you just want to burn MP4 format to DVD format, ignore this.
Adoreshare DVD Creator
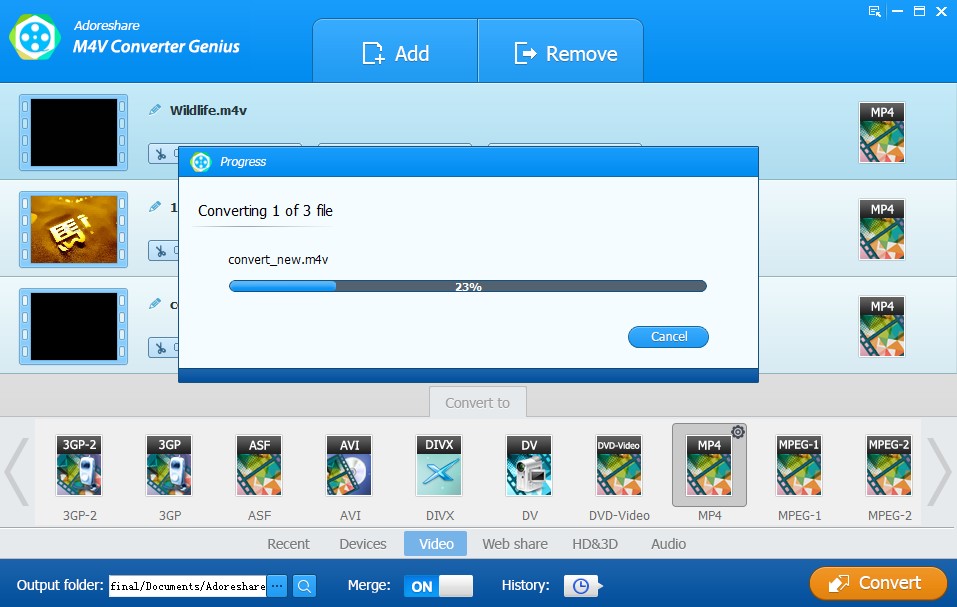
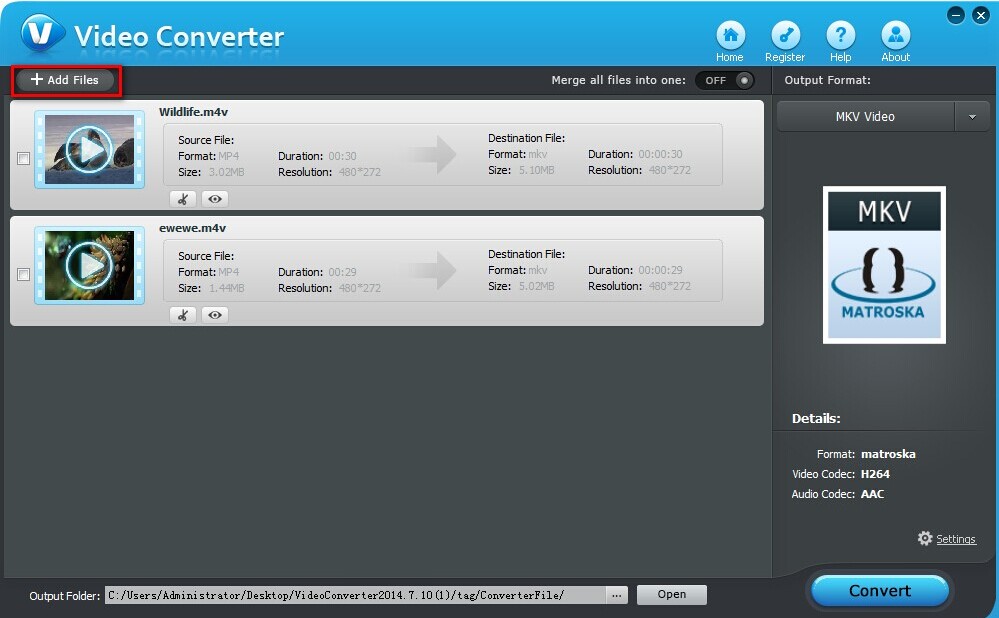
Step 2: Import the MP4 videos to the program
You can see the “Add Files” button at the top-left corner. Just click it to add. Or drag the files directly. You can add one or multiple files and convert all of them at a time.
add files to program
Step 3: Edit MP4 videos before starting burning
Well, this is an optional step. Adoreshare DVD Creator Mac provides powerful video editing function. You can add a watermark on your video, or just want to crop a video. Highlight a file and click ”  ” to enter the edit interface.
edit files in program
Step 4: Customize DVD Menu
It is a useful step. In general, I add several video files to a DVD disc. Then I create a DVD menu in the disc. In this way, my father can choose from the DVD any  video he likes.
I think you have noticed the button like this . Yes, you need to choose a DVD menu style and click the button. You will see various styles, just choose one. Everything will be OK after you finish editing the menu like menu style, frame, button, text, background music/picture.
dvd menu
Step 5: Burn to DVD disc
Choose “DVD DISC” as output option. Finally click “Burn” and give your new DVD a name. Click Save to start burning your files.
save filesThis is the whole progress of burning MP4 videos to DVD and DVD disc. I have sent these DVD discs to my father as gifts. He was happy. Maybe you can also do this.

Everything you need to know about M4V file

iTunes offers plenty of great videos and we can share them with our friends. However, do you know what file format are iTunes videos? Yes, all iTunes videos are M4V format. What is M4V format? This is what we will talk about next.

m4v files

What is M4V format?

The M4V format is a video container format, which is created with DRM copy protection by Apple. Actually, this video format is very similar to the MP4 format. DRM copy protection is the only difference between MP4 and M4V. Apple uses M4V to encode video files, such as TV episodes, movies, and music videos, in its iTunes Store.

How to play M4V video?

In general, you can play M4V videos with iTunes. If you have installed the latest iTunes on your computer, just double-click the M4V files and play. You can also play M4V videos with other video players. Here is a brief chart.

Name Company Platform Download
QuickTime Player Apple Inc. Win/Mac Download
iTunes Apple Inc. Windows/Mac Download
KMPLayer Pandora TV Windows Download
VLC Media Player VideoLan Organization Win/Mac Download
UMPLayer Ori Rejwan Win/Mac/Linux Download
XBMC XBMC Foundation Win/Mac/Linux Download
DivX Player DIVX Win/Mac Download

iTunes can’t M4V files: How to convert M4Vto play on iTunes

In general, M4V can be played by iTunes. But it may be not if you got the M4V video from someone or somewhere instead of iTunes Store. iTunes will refuse to import and play those M4V files (especially the M4V movies that are not purchased through iTunes or the M4V video created using CloneDVD Mobile, downloaded from websites, converted by HandBrake or Toast 10 and etc).
Actually it is easy to deal with this issue, just converting M4V videos with Adoreshare M4V Converter Genius. This program can remove iTunes M4V DRM protection and convert M4V to other formats like MP4, AVI, FLV, and MKV. Just three steps:
1. Import the M4V files by “Add” button (Or you can drag the M4V file to the interface)
2. Choose output format and output folder. You can choose output formats from 6 categories: Recent, Devices, Video, Web share, HD & 3D, Audio.
3. Start Converting. Click the “Convert” button. It won’t take too long for converting videos.
After these steps, you can play the converted M4V movies on any devices.

Further problems about M4V files

If you have more questions about M4V files, please let me know what your problem is. You also can comment this post. I will answer you as soon as possible.

How to convert iTunes DRM videos from .M4V to .MP4

As is known to all, iTunes is getting more and more popular, and people often watch videos in iTunes by purchasing and renting. You can play iTunes movie or music on Apple device like iPhone or iPad, but you can’t do that on non-Apple device, especially on Android devices. This is because iTunes movie and music are DRM protected.
Let’s have a look of DRM. M4V format is a video format developed by Apple Inc., and is widely used in iTunes videos, movies, and TV shows. Actually, M4V format is much close to MP4 format.
So if you want to play iTunes movie on a non-Apple device, you must remove DRM protection first. This post tells you how to remove iTunes DRM and convert m4v to MP4.

m4v converter
Adoreshare M4V Converter Genius is the software that can convert DRM-Protected iTunes M4V Videos to Any Format to Play Anywhere. You can trim, edit, rename during the conversion. You will know more details on the following page.

What you need to prepare:

Detailed Steps to convert iTunes M4V videos to MP4:

Step 1: Add the M4V videos to Adoreshare M4V Converter Genius.                                               You can add one or more M4V files to it. There are two ways

  • Click the “Add” button and choose the M4V videos
  • Drag the M4V videos to the program directly(This is easier)

add m4v video

Step 2: Choose “MP4” as output format. From the format bar, click “Video”->”MP4”.
Tips: Adoreshare M4V Converter Genius allows you to choose output format as these 6 categories: Recent, Devices, Video, Web share, HD & 3D, Audio. You also can choose other output format like AVI, MKV, WMV.

Select output format
Step 3: Specify Output Folder to save the converted videos.
You can click ”Browser” button to choose the output folder. If you don’t change it, the converted videos will be saved in a fault folder named Adoreshare.
Select output folder

Step 4: Click “Convert” button to start. The process bar will be displayed with the number of videos that are being converted.
start-converting

This is the whole conversion steps of removing iTunes M4V DRM. Now find the converted videos, you can play them on any devices and anywhere.

Further reading: The differences of M4V and MP4

  • M4V was created by Apple, which can protect M4V files copyright and prevent Apple devices from transferring files to the users who didn’t pay for the content. M4V files can only be play on Apple devices.
  • MP4 is a popular video format and has no copyright protection. You can play the MP4 videos on any video players and devices.


WMV Converter- Convert from/to WMV Video Files

Need to Convert .mp4 to .wmv Files

how to convert videos to/from WMV

WMV Converter

Can anyone tell me a good converter to convert my mp4 movies I have for my iPod and from copying DVD’s onto my computer to WMV format? So far I have found tons of converters that do it from WMV or other files to MP4 but nothing that does it backwards…. Any help would be appreciated.

——Asked one user from Yahoo Answer


Yeah, we know, though there are some downsides of WMV file format like it can’t be played on non-Windows system without installing additional component, it is still one of the most popular formats for internet video streaming. One thing why it is favored is that it works better with smaller resolution, producing better quality and smaller file size.

About WMV File Format

WMV (Windows Media Video) is Microsoft’s universal compressed video container format for several codecs. It is originally developed for Windows Media Framework to be used for streaming internet technologies. Initially WMV was a proprietary format, latter being approved by SMPTE as an open, standardized format. There are few versions of WMV format, WMV9 being the current, most advanced and used.

Is There Any Program to Convert WMV Videos to Other Formats or the Other Way Around?

Since WMV can’t be played on non-Windows system, so we need to convert WMV to MP4 or M4V or so to play it on Apple Mac OS. In some other cases, we need to convert other formats to smaller size for space-saving, then WMV is a good choice for this, in this case, you need to convert other video formats to WMV.

The question now is how to convert videos to WMV or convert WMV files to other file formats like MP4, M4V, AVI, FLV, MKV, MTS, QuickTime MOV, MPG, 3GP, etc. Fortunately, WMV Video Converter can do this, everything in one!

WMV video converter is specialized in changing various video files from/to multiple formats. Video converter is its original name, key features are as follows:

1. Multiple input and output formats are supported

Note: Click here (Video Converter Spec Tech) to check specific formats that converter supported

2. Output files can be played on hundreds of devices

3. No quality loss, fast speed

4. Easy-to-use and clean interface

User Guide of Video Converter for WMV

video converter program

Tenorshare Video Converter

Since we have got a program to convert video file formats, let’s learn how to use it together. Just 4 simple steps, like a pro, take it easy, no need of specialized skills.

Download it from official site: http://www.tenorshare.com/products/video-converter.html

Mac users should switch to Mac version, download Video Converter for Mac.

However, the using steps are the same for Windows and Mac, seen as below.

Step 1: Import videos (WMV or other files needed to convert)

When program is launched, click “Add” or drag video files to the main interface.

Step 2: Select output file formats

From the tab, you can choose the format you need. When confirmed, proceeding on.

Step 3: specify output folder and start conversion

Note: If you need to edit videos, do it before conversion. You are allowed to edit trim/crop a video, add watermark or subtitle, merge multiple videos into single one, take a snapshot from a video and so forth.

After video editing is done, specify a folder to save the converter videos and click “Convert” to start the video conversion.

It is easy, right? Feel free to share it with your friends if works! Express your satisfactory or convenience when using this program on the comment box. I would reply is ASAP.

Need free video converter? Here is a list of recommended free video converter programs.

Top 3 Free Video Converters – Make Video File Formats Conversion Easy and Quick

Different Video Formats Standard and Devices Make Compatibility a Difficulty

Videos come in many different formats with different codec standard: MOV, FLV, AVI, SWF, WMV, M4V, MP4, etc. And have you imagined that every device/player could handle every possible format so that you don’t need to worry about the compatibility of formats and devices.

But, of course, this is just an imagination at present. The truth is not the desired case. Maybe in the deep future, it could become the truth.

Can’t Play Videos Because Format not Supported

So often, we will download a movie/video to PC/Mac, phone or tablet, but it has major palyback problems like can’t open the movie because the format is not recognized by your device, no pictures, no sound and more. All these can be attributed to format not fully compatible.

How to Convert Videos/Movies to Proper Format for Your Device?

How can you solve these problems? With free video file format conversion tools, these shouldn’t hold you up for long. There are plenty of such video conversion programs and nearly all can quickly import videos in just about any format and export them in formats you need.

Generally, taking one of the free video converters as an example, the input and output format can be summarized as below:

supported input file formats

output file format supported

Now, the problem is not to worry about no video converter is available, it is how to choose a reliable and real free video converter. Being faced with so many conversion tools, do you always wonder which one is the best? If it is the case, just read this article. Top 3 free video converters are recommended. We need not that many programs, but need the strongest ones.

Top 1: Tenorshare Free Video Converter

freeware video converter

Tenorshare Free Video Converter is a totally free and easy-to-use tool that enables you to convert video and audio files. It converts various video files such as .mp4, .mov, .mts, .mpg, .flv, .mkv, .avi, etc. so that they can be played on different devices, such as iPad, iPod, iPhone, BlackBerry, etc. Just enjoy converting videos for free.

Don’t believe it, just download it for a try >> Download Tenorshare Free Video Converter

Top 2: Freemake Video Converter

top 2

“Convert video free to AVI, MP4, WMV, MKV, 3GP, DVD, MP3, iPad, iPhone, PSP, Android phones. Video to MP3 with one click! Rip & burn DVD. Convert YouTube to MP4, AVI, etc. with Freemake! Guaranteed result“. Freemake guaranteed like this. Yeah, it is indeed the truth.

>> Download Freemake Video Converter Free

Top 3: HandBrake

top 3HandBrake is a tool for converting video from nearly any format to a selection of modern, widely supported codecs.

Reasons you’ll love HandBrake:

  • Convert video from nearly any format
  • Free and Open Source
  • Multi-Platform (Windows, Mac and Linux)

>> Download HandBrake

How to Play/Watch WMV Video Files on iPhone

WMV is Widely Used on Video Recording and Making

As we know, WMV (Windows Media Video) is a popular video file format used for streaming video, screencasting and slideshow presentations. If you ever paid attention when creating videos by converting a presentation to video or recording screen sharing, you will realize that the recorded videos are mainly saved as WMV file.

However, the problem is iPhone does not natively support opening WMV files. How can you overcome this limitation so that you can play and enjoy WMV videos on your iPhone? A good idea is to convert your WMV videos to M4V or MP4 that iPhone can directly play.

how to convert wmv to m4v or mp4

Play WMV on iPhone

How to Convert WMV to M4V/MP4?

While I went searching for an idea on how to play WMV files on iPhone, there are a lot of results.  But finally, I found a great and easy-to-use App – Tenorshare Video Converter. Not only Windows Version is offered, Mac version also works well for me. Windows users can use the free Windows Video Converter, but no free package for Mac.

All of the expected options and features are there

1. Multiple Input and Output File Formats are allowed

supported input file formatsoutput file format supported

2. Fast conversion speed

3. Safe and clean, no quality loss as well

4. Editing and conversion are both enabled in this program

5. One click to merge a variety of videos into one

Simple steps are as below, just try and do it yourself!

Step 1: Load and import videos that need to be converted

You can click “Add Files” to add video. Or drag your videos to the interface of this software.

Step 2: Choose a right output format that your iPhone recognized like M4V, MP4

Click the inverted triangle shows a format combo box. And select an output format. There are accurate output video selections for iPhone, iPad, YouTube, HD video, etc. If you want to modify advanced parameters for your video, click “Setting” button, and you can adjust encoder, bite rate, frame rate and resolution for the video, and adjust encoder, channel, sample rate and bit rate for the audio.

Step 3: Specify output folder

Click “…” button to specify the output folder to save the converted videos. You can edit your videos before conversion.

Step 4: Start video conversion

When all is prepared, click “Convert” button to convert video. After conversion finished, click “Finish” button to close the window. And click “Open” button to find the folder where the output files are saved.

Note that this video converter also converts audios as an audio converter. Read mode details here: Convert All Audios to AAC, AC3, AIFF, AMR, AU, FLAC, MP3, M4V,etc


Best Audio Converter – Convert All Audios to AAC, AC3, AIFF, AMR, AU, FLAC, MP3, M4V,etc

As the name tells us, audio converter is designed to convert audios file from one format to another. If you are suffering a problem of can’t play audio files because the format is not recognized by your device/player, you are coming to the right place. This article will introduce you an easy-to-use and reliable audio converter. It also demonstrates how to use this program. Let’s learn more in the below.

Important: Not only is it an audio converter, it converts video files as well. There is more information about how to convert video files with this video converter.

audio converter

Key Features of Audio Converter

1. Support multiple import and output file formats

Supported file formats (for audio) list

Input: MP3, MP2, AAC, AC3, WAV, WMA, M4A, RM, RAM, OGG, AU, AIF, AIFF, APE, FLAC, NUT. Output: AAC, AC3, AIFF, AMR, AU, FLAC, MP3, M4V, MP2, OGG, WAV, WMA

2. Output files can be played on hundreds of devices

After audios are converted to your wanted file format, there is no compatibility issue for playing your audio. Then you can play your audios on various devices, listed below:

Mobile Phones: iPhone (iPhone 5s, iPhone 5c, iPhone 5 included), Samsung S (Samsung S5, Samsung Galaxy Note 3, included), HTC One X, Blackberry, etc.

Tablets: iPad (iPad Air, iPad mini 2, iPad mini, iPad 4 included), Samsung tablets, etc.

iPod (iPod touch 5 included)

Playback devices: Apple TV, PSP, PS3, Sony TV, XBOX, Wii, etc.

Video player software: Windows Media Player, QuickTime, iTunes, Zune, etc.

Video editors: Windows Movie Maker, iMovie, Final Cut Pro, Adobe Premiere, Virtual Dub, etc.

3. Freely share converted audios

Converted audios can also be shared on YouTube, Netflix, Daily Motion, vimeo, and embedded in PowerPoint, Email, WordPress, PDF, etc.

4. No quality loss and high conversion speed

It largely shortens your waiting time by booting with NVIDIA® CUDATM, AMD and Intel Core without quality loss.

How to Use This Audio Converter Software?

It is easy with 4 steps, like a pro.

Step 1: Load your audio files to this program.

Step 2: Choose a wanted output file format. The available output file formats are listed above.

Step 3: Specify a save path for the converted audio.

More information is available on guide of audio converter.

Video Converter for Mac – Handle Virtually Any Video Formats Conversion on Mac OS

Need Video Converter for Mac When:

1. Video can’t be recognized when editing: Your video file stuck in a format not recognized by the editing program when you want to edit the video

2. Video can’t be supported when playing: You can’t play your video because the player doesn’t support the file format and can’t open it

Maybe and more… Have any other more situations, please comment to tell me.

How to Do Video File Format Conversion?

When you need to convert your video files to the format that you want and your devices/player supported, you may consider looking for a video file format conversion tool/program. Then, you are going to the right place! This article introduces you an easy-to-use and full-featured video converter for Mac. Let’s have a look at more information about it.

video converter Mac

                                      Tenorshare Video Converter for Mac

Key Features of Tenorshare Video Converter for Mac

1. Multiple input/output file formats

It supports to convert from/to a variety of video file formats including AVI, MOV, MP4, FLV, MPEG, VOB, 3GP, 3GP2, DivX, MKV, QuickTime MOV, WMV, etc.

2. Broad compatibility with all Mac OS for Mac Version (Note: Windows version is compatible with all Windows OS)

It works well with Mac OS 10.9 Mavericks, 10.8 Mountain Lion, 10.7, 10.6, 10.5

3. Not only video converter is it, but also powerful video editor

It is thoughtfully designed to convert, edit and manage video in one ware. It allows you to merge multiple files to one if needed; preview video when editing and before converting; trim video clips; crop segment to justify video size and remove video black bars; add watermark on the video to avoid video misuse after uploading online; change video effect to make better videos, etc.

4. No quality loss and faster speed

It largely shortens your waiting time by booting with NVIDIA® CUDATM, AMD and Intel Core.

5. Lifetime software update after registering

As long as you registered to the full version, it means that you have owned the right to get a lifetime license which allows you to free update the software.

How to Use Video Converter Software to Convert Your Video Files on Mac?

Easy with 3 steps, it is like a pro. Go to download Tenorshare Video Converter now and go through the following steps. You can make the video conversion easily and quickly.

Firstly, load/import videos that needed to be converted to this program

Then, select an output file format that your player/device supported

At last, press “Start” to do file conversion

Note: If you need to edit your vide, then you should edit it before format conversion.

For windows users, download Video Converter for Windows.

The below table shows you the supported input and output formats supported with this video converter.

Allowed Input File Formats

supported input file formats

Allowed Output File Formats 

output file format supported


Free and Easy Video Converter Tool – Make Video Conversion With 4 Steps

Need Video Conversion

As to digital photos, all file formats are supported to view on sites, portable devices though some sites don’t support to upload some certain formats. On the contrary, videos don’t have a common standard so that different devices support different video file formats!

Now imagine that you have a portable video player and would like to watch your home video using it, or one of your friends sends you a wmv video but your device can’t support that format, or you want to convert a video to some other formats and save it on PC/iPhone/tablet, etc.

How can you make video conversion possible? Indeed, it is easy with a video converter! So many video converter tools, how to choose a right one? This article gives you an introduction of a piece of freeware Tenorshare Video Converter.

Key Features of Tenorshare Free Video Converter

Now that video conversion is perfect with this Video Converter, let’s have a look at the key features.

Free: Totally free to convert video file formats

Safe: Won’t damage your device, computer, and video

Multiple Input/Output Formats: Up to 160 file formats are available for choice

Fast: For a short video, only a few seconds are taken to make the format conversion

Easy: Easy with 4 steps to complete the whole conversion process (Shown as below).

How to Use Video Converter to Convert Video File Formats?

how to convert a video file

Freeware Tenorshare Video Converter

Step 1: Click the free download link to download it then install it on your Windows PC.

Note: Free video converter only support Windows version and if you are a Mac user, maybe you have to get the paid version here: Convert videos format on Mac.

Step 2: Click to run the program or choose to run it after installation is finished. And you now are in the main interface with control panel. Here in the “File”, you can click to upload files that need to be converted.

Step 3: Specify output formats and destination folder to save the converted video from the bottom of the program.

Step 4: Click “Start” to start the video conversion. It is fast generally, but if have a long video, maybe you need to wait a moment. Just take a rest of your eyes from computer.

Bingo! Now you have got your converted video? Enjoy it freely!